
First, add a new firewall rule on your server. Then you change the registry. How to do this is described in detail below.
Firewall Regel anpassen/hinzufügen
If you have changed the RDP port, you must ensure that the Windows firewall (or other firewalls) has a rule for the new port.
- Open the Windows Firewall (via the Control Panel).
- Create a new rule for incoming traffic on the new RDP port.
- Select “Port” and click next.
- Select “TCP” (RDP uses TCP) and select “Specific local ports” and enter the new port that you have already changed in the registry. Click on Next.
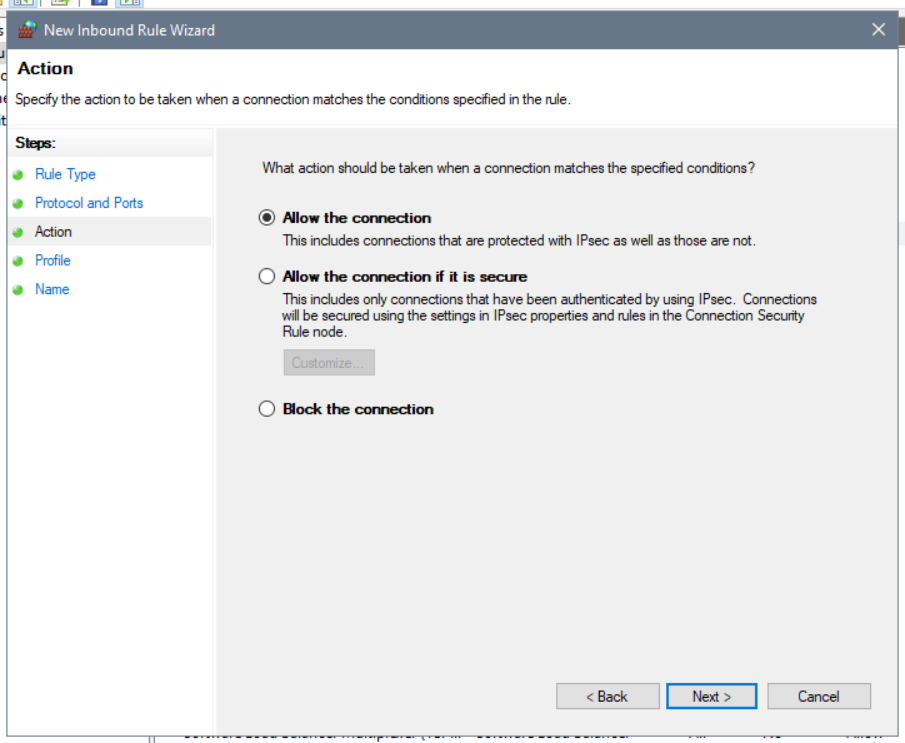
- Select “Allow connection” and click next.
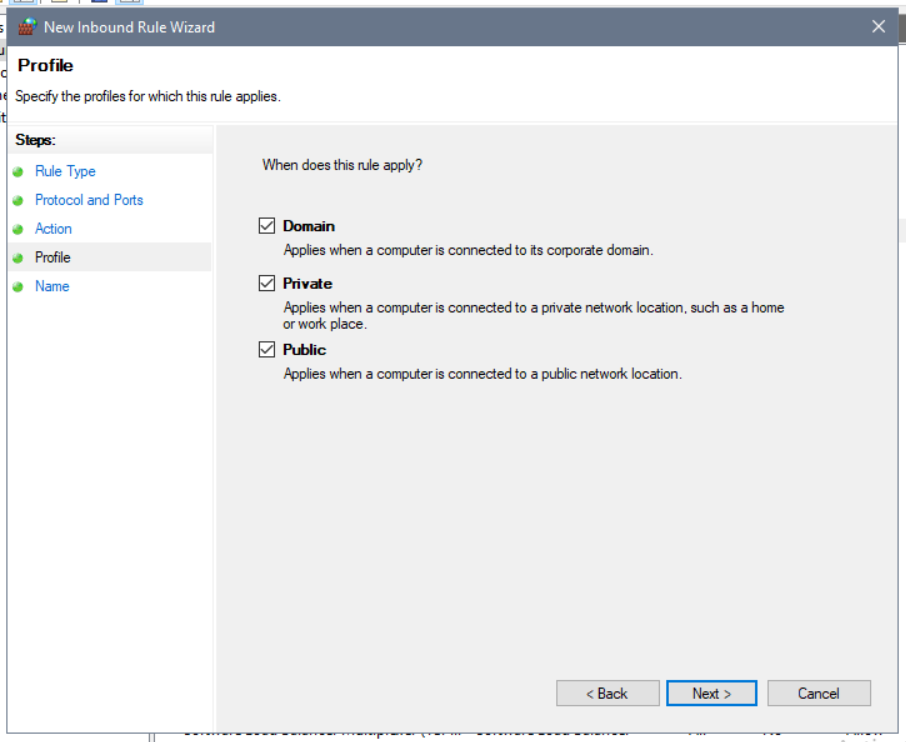
- Select the profiles to which the rule should apply and click Next.
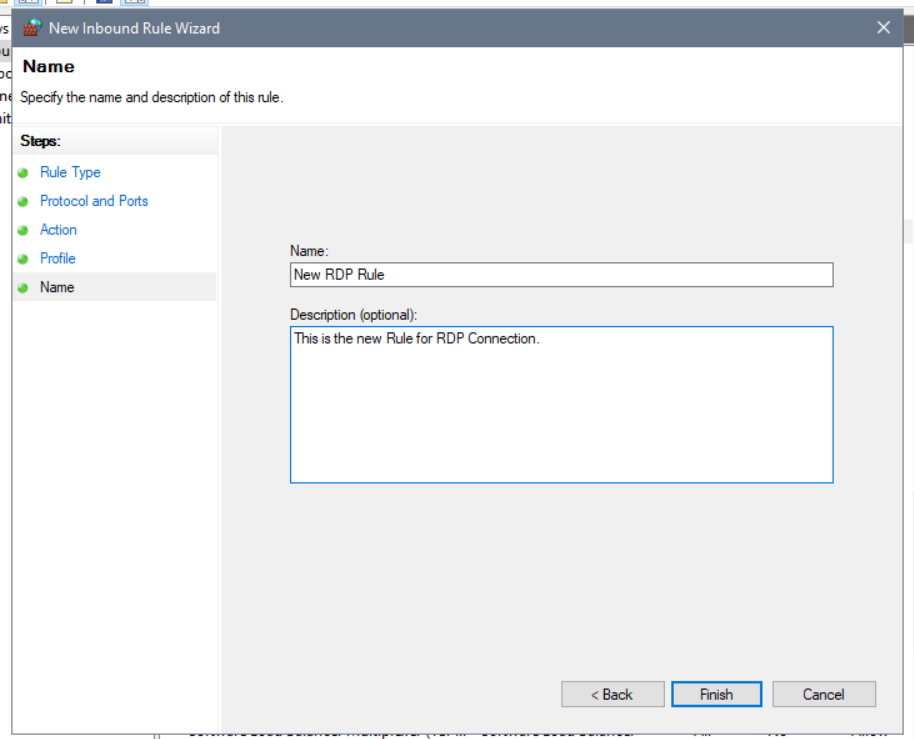
- Now name the rule e.g. RDP new port and click Finish.
Registry anpassen
- Open the registry either with the key combination Windows + R and enter regedit or via the menu search “Registry Editor”.
- Navigate to the following path:
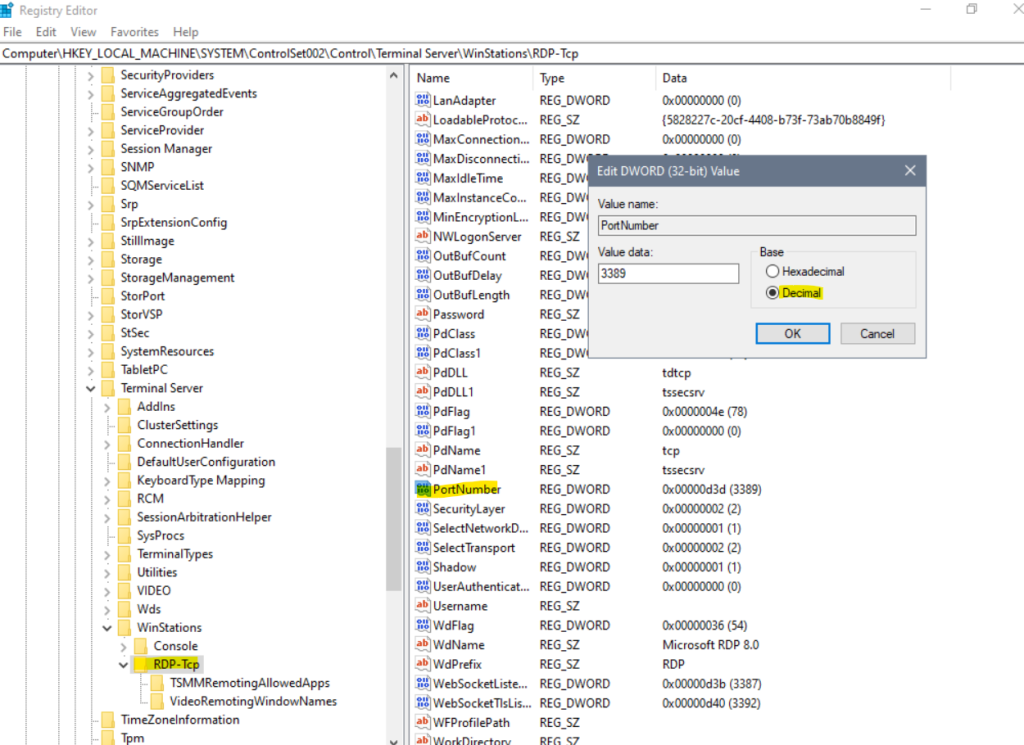
HKEY_LOCAL_MACHINE\System\CurrentControlSet\Control\Terminal Server\WinStations\RDP-Tcp- Select the entry “PortNumber” and open the entry.
- Change the value type (Base) to Decimal (if not already set). Now you can select a new port and confirm with OK. The default port is 3389.
You must then restart your server and can connect via the new port.