A much-requested function of our hosted Exchange is the activation of the deputy function. Since this is not done with a simple mouse click, we have written instructions for you here.
Why is?
The deputy function means that a second person has access to an e-mail inbox or other functions (calendar, tasks) and can create entries for the person represented or read e-mails.
This mostly applies to absences.
How do you set it up?
The facility is in two parts.
On the one hand, the person who is represented must approve this.
On the other hand, the person who takes over the deputy must also take over this.
It is also the case that you can currently only set this up if you have set up your own e-mail address in Outlook. Setup via the web interface/webmail is currently not possible.
How do you unlock the features?
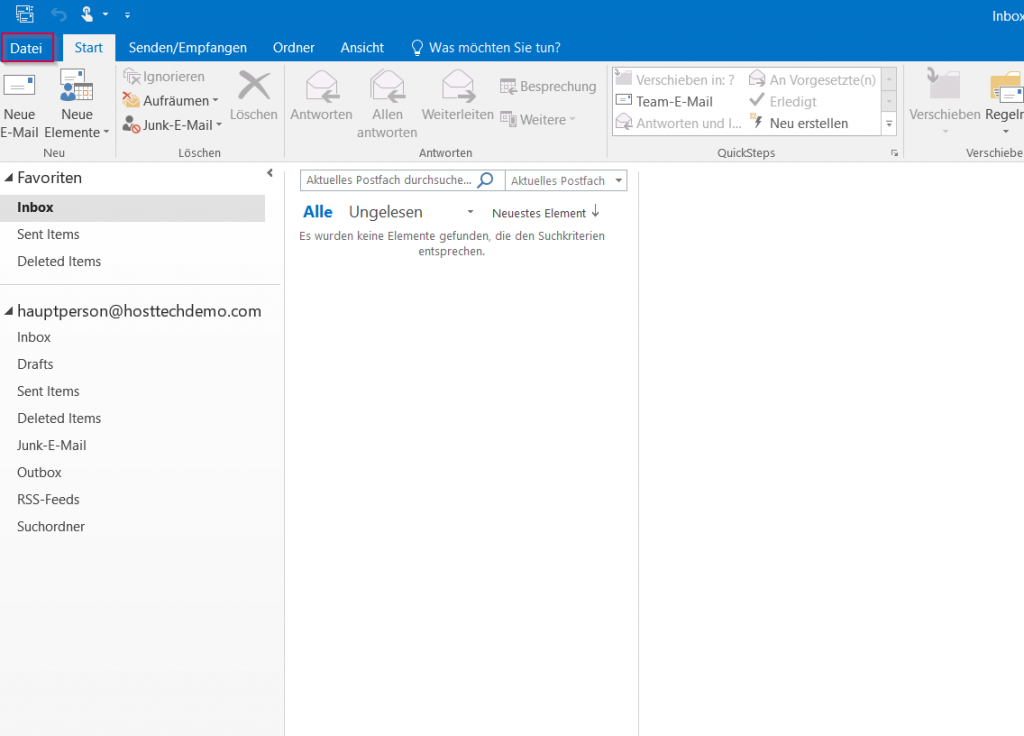
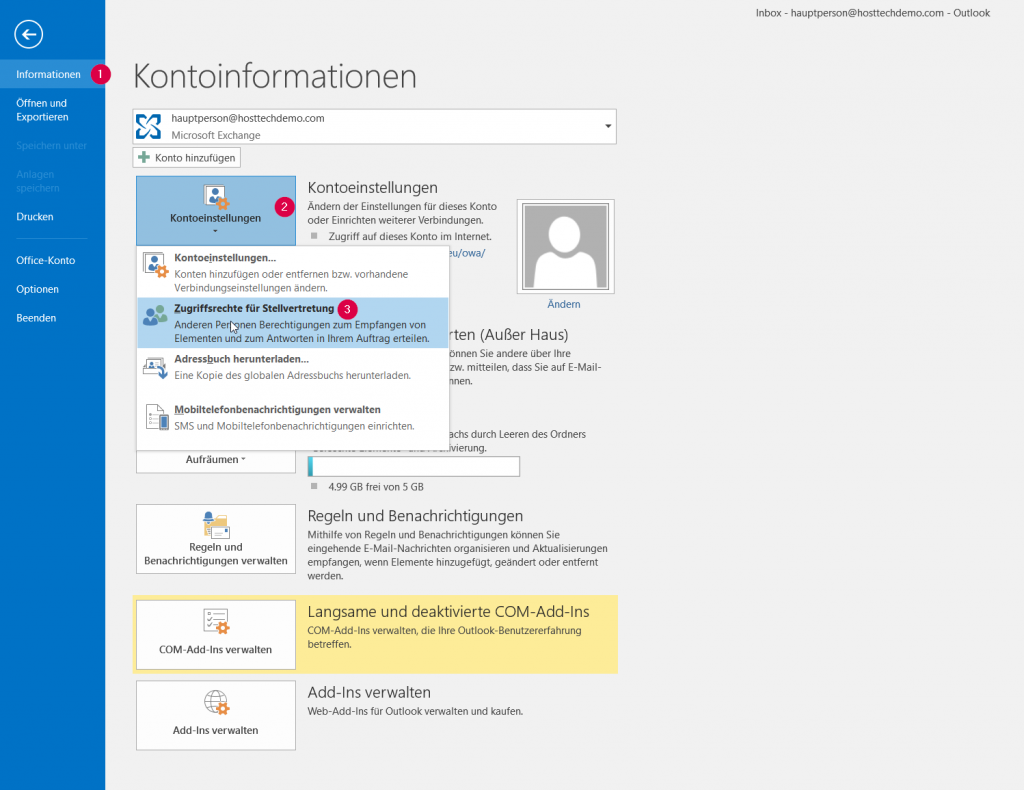
First, you need to grant permissions to the delegate. To do this, first click on “File” in the upper left corner of Outlook, then on “Information” on the left and then on “Account settings > Access rights for delegates”.
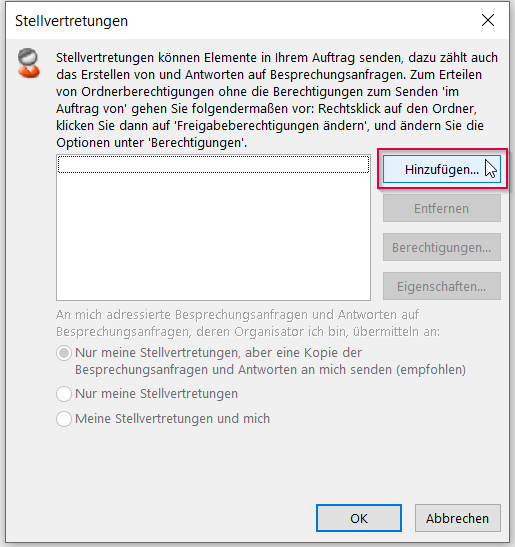
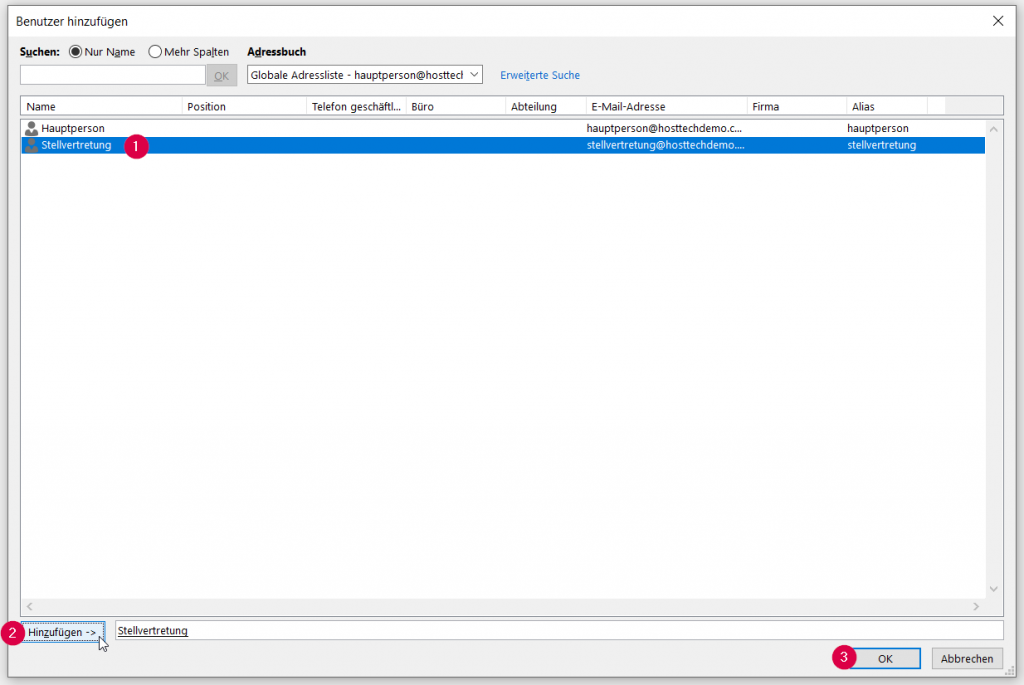
In the view that opens up afterwards, you can add people with an email address (user) in the same domain. To do this, first click on “Add” and then mark the person for whom you want to set up the deputy.
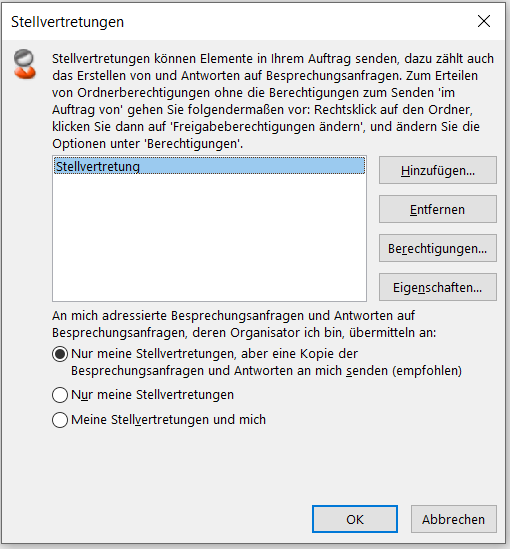
By clicking on “Add” on the bottom left, the person is listed in the list on the right. Click on OK to close this view again.
A window will now open in which you can set the permissions for the person who is to act as a substitute.
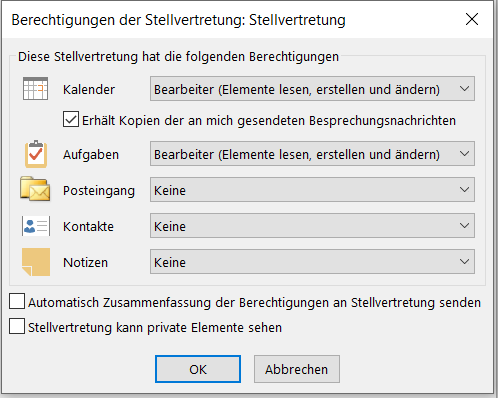
You have to adjust the permissions according to your wishes. If you want the person to manage everything, you can set the permissions as follows.
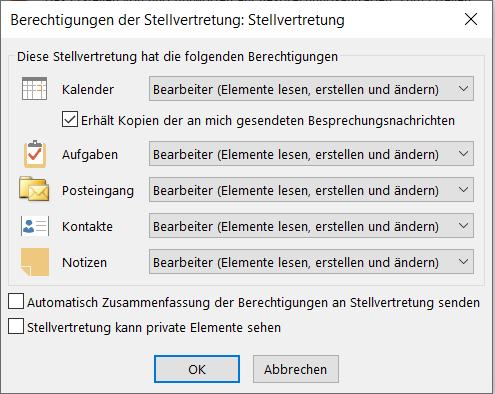
Clicking on OK closes the view and you can now see the user in the list of substitutes. Clicking on OK also closes this. The permissions for the person are now set.
share folder
What you have to do now are the permissions for the folders.
Unfortunately, these must be set individually for each folder and cannot be inherited for subfolders.
To do this, right-click on the account on the left (once for the email address itself and once for the INBOX). Then also for all subfolders that the deputy should manage.
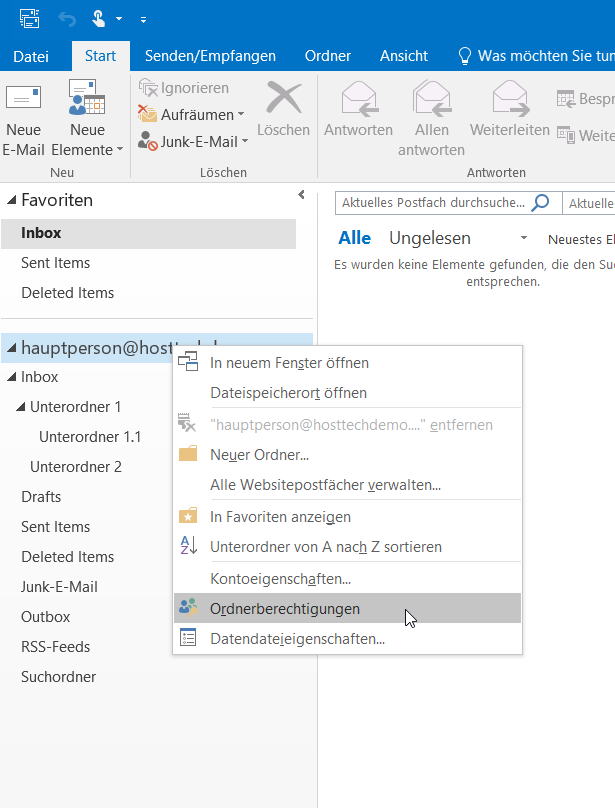
Then select “Properties” (the e-mail address itself says “Folder Permissions” – see screenshot above) and in the new window you must then switch to the “Permissions” tab and add a user. This is the same as in the intermediate step above.
You then assign the authorization level “Editor” to the user.
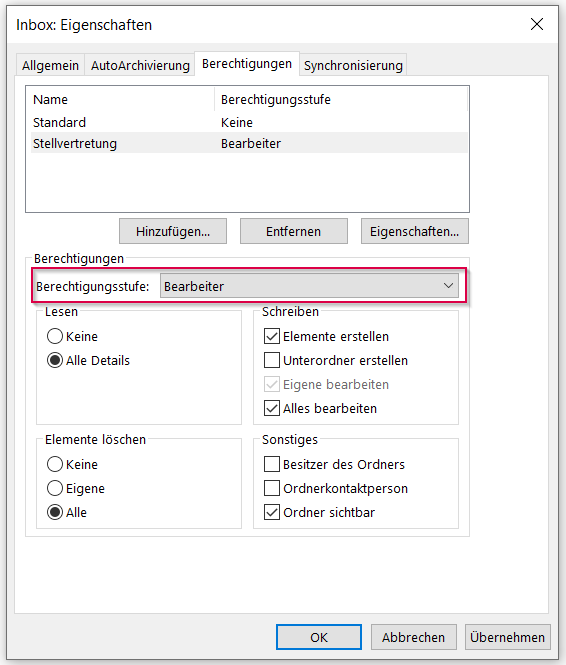
How do I take over the deputy of the released functions?
In most cases, the person who was set up for the substitution will see the additional mailbox after restarting Outlook. Nevertheless, we have had cases in which it did not work automatically. In such a case, you must take the following steps as a representative.
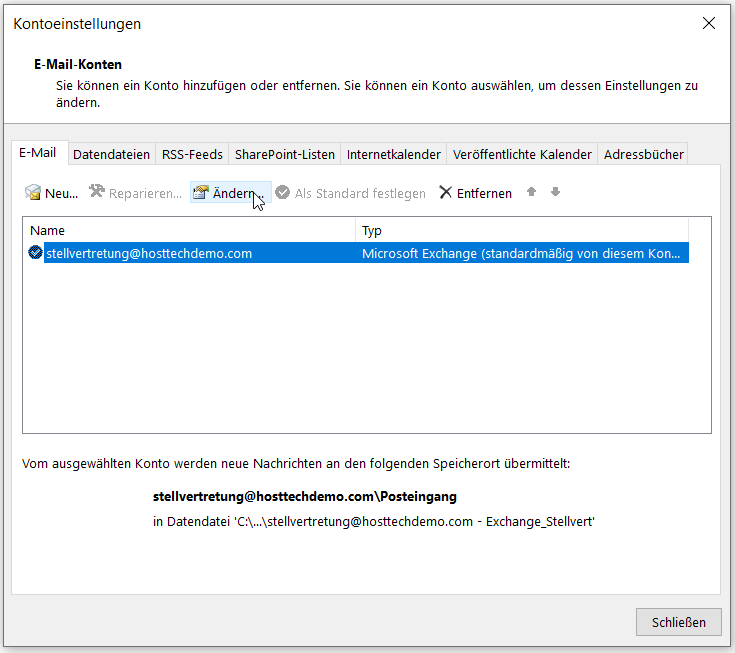
Click File in the top left again, then select Information on the left, so you can then click Account Settings > Account Settings.
When your email address is selected below, click on “Change”.
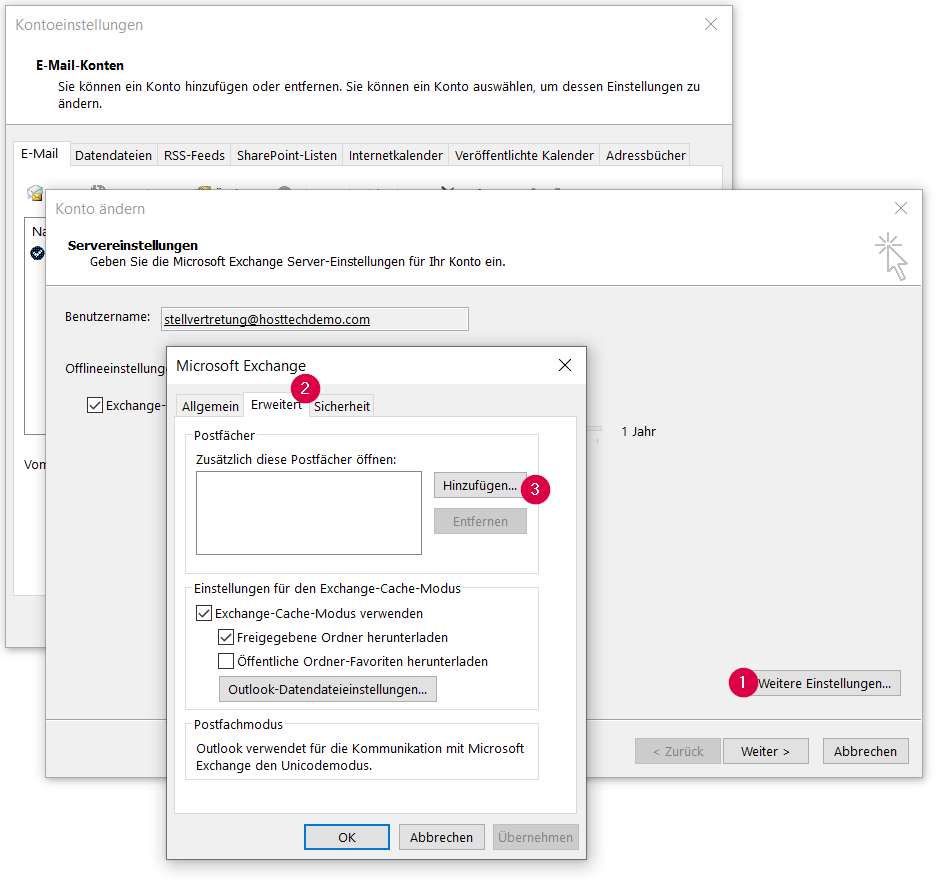
Then click on “More settings…” in the lower right corner and switch to the “Advanced” tab in the new window. Here you click on “Add…”.
Now if you provide the email address of the person you are the delegate for and click OK, it will find and add that person.
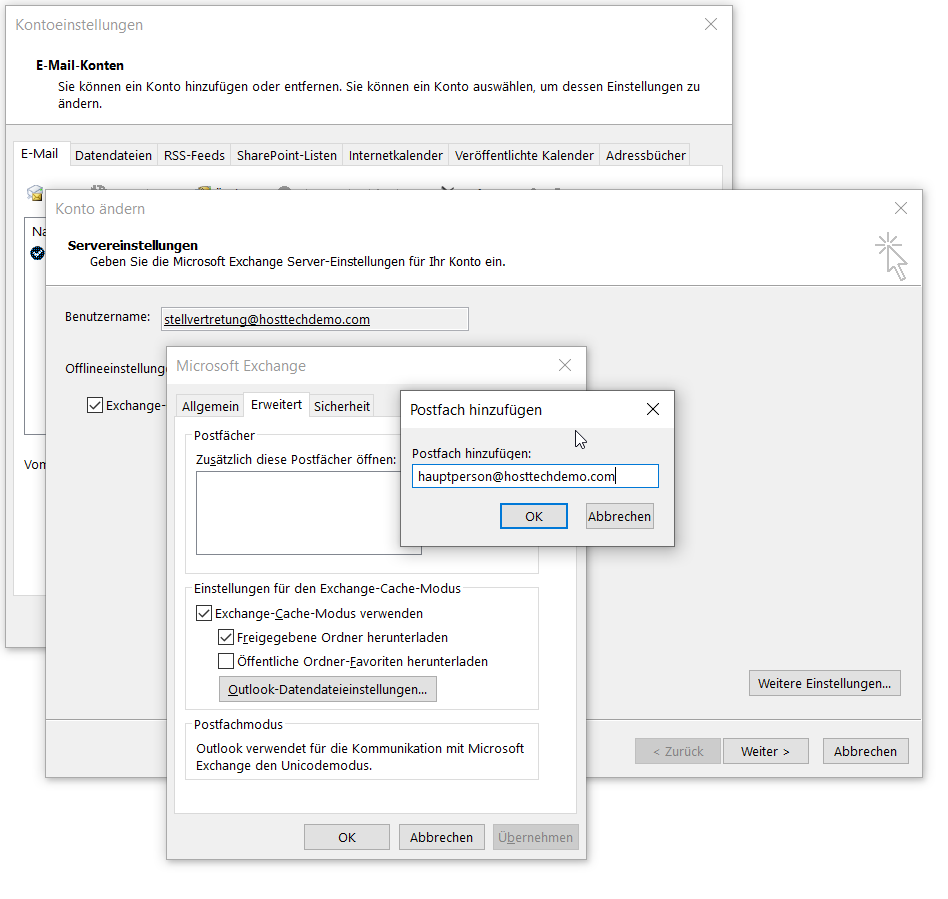
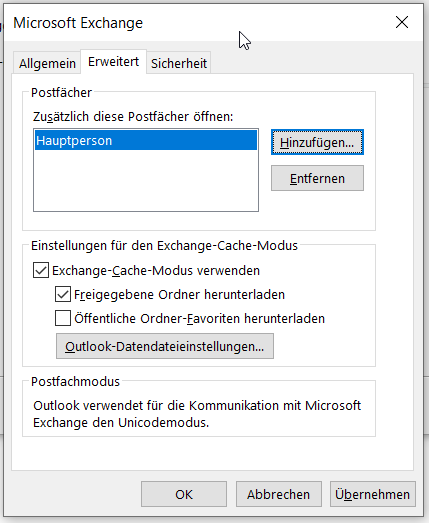
Then click on OK and on the bottom right on “Next >” to complete the setup.
From now on, on the left below your email account, you will also see the account of the person you are deputizing for and the folders that have been shared with you.