
With pfSense, you can create a router, a DNS server, a gateway server and a firewall in just a few steps.
With the virtual Datacenter from hosttech, you have the option of creating private networks. These are pure Layer2 networks without IP management or access to the Internet. This was deliberately chosen to offer you as a customer maximum flexibility. A gateway server with integrated firewall, DNS and DHCP services as well as a VPN remote station is suitable for connecting servers from this network to the Internet or creating central IP management. There are various ways to achieve this.
One of them is pfSense. This operating system, based on OpenBSD, is designed precisely for this purpose and is easy to install.
Vorbereitungen
In this article we describe the installation of a server that has two network cards. One is connected to the Internet (e.g. directly to a modem, or in the virtual data center to the public network) and the second is connected to the private network. You can also connect the server to the networks via a network card but different VLANs. However, we will not go into that in this article.
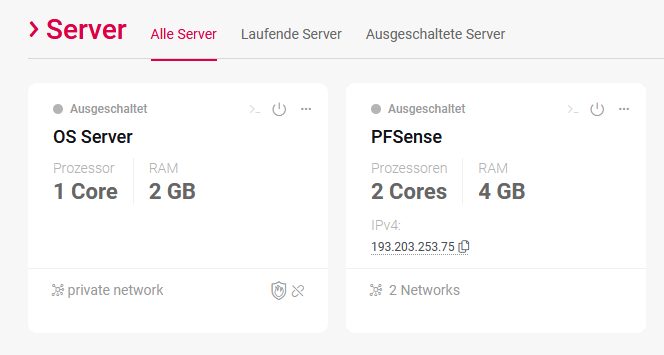
Create two servers in your virtual data center.
- Create a server. The first server will be the pfSense server. This is connected to the public network (you must also book an IP) and to a private network. For the operation of this server, 2 core, 4 GB RAM and 10 GB storage space are completely sufficient.
- Create another server: The second server can then be a Windows Server 2019, for example. Of course, pfSense is also compatible with Linux servers or other operating systems that support DHCP. Ultimately, the server only serves to check the function. If you want to integrate the pfSense directly into an existing network, you can skip this step.
pfSense installieren
After the server has booted the ISO, you will be presented with various boot options. The standard here is the multi-user boot. This is also automatically selected after a few seconds and is exactly the right variant for the situation described in this article.

We summarize the next 10 steps here in short points
- License Agreement
In the first step, you will be asked to accept the pfSense license. To do this, simply confirm with< Accept> - Welcome screen
In the welcome screen, you can select recovery options as well as the installer. But since you want to install pfSense, choose< Install> and confirm again with Enter. - Keymap
In this menu you select the appropriate keyboard layout and continue with the installation. - Partitioning
Here you can customize the partition table according to your wishes. For our pfSense installation you have to select “Auto (UFS) BIOS” here. - Manual Configuration
The installation is already complete at this point. However, pfSense offers you to open a shell once again in order to do it yourself. You can also make all changes afterwards, so choose here< No> the end. - Complete
And once again, exactly the same. You will be asked if you want to reboot the server or open a shell again. vote here< reboot> the end.
After the server has been restarted, the ISO is automatically booted again. You can then switch off the server. Here you can also use the “Power off” button in the virtual data center GUI. Remove the ISO and restart the server again.
After some loading time, the setup will continue. - Should VLANs be set up now [y:n]?
As already mentioned, you can also work with different VLANs. Since you can work with a sufficient number of network cards in the virtual data center, you don’t need to worry about this for the time being – so confirm with “n” for no . - Enter the WAN interface name or ‘a’ for auto-detection (vtnet0 vtnet1 or a):
In the virtual data center, the first network is always the public network. All private networks are in the order in which you added the networks to the server. So the WAN network is “vtnet0” - Enter the LAN interface name or ‘a’ for auto-detection
NOTE: this enables full Firewalling/NAT mode.
(vtnet1 or a):
In this step, you select the interface that is connected to the private network. So here “vtnet1” - The interfaces will be assigned as follows:
WAN -> vtnet0
LAN -> vtnet1
Do you want to proceed [y:n]?
If the settings are correct, select “y” for yes. The server now loads for some time and then restarts.
After the server has started up again, the following picture awaits you:

2) This is the IP address under which pfSense can be reached in the internal network, as well as the CIDR of the addresses that the DHCP makes available to the network.
The pfSense is now fully installed. We will show you how to configure different port releases using RDP for the Windows server.
pfSense konfigurieren
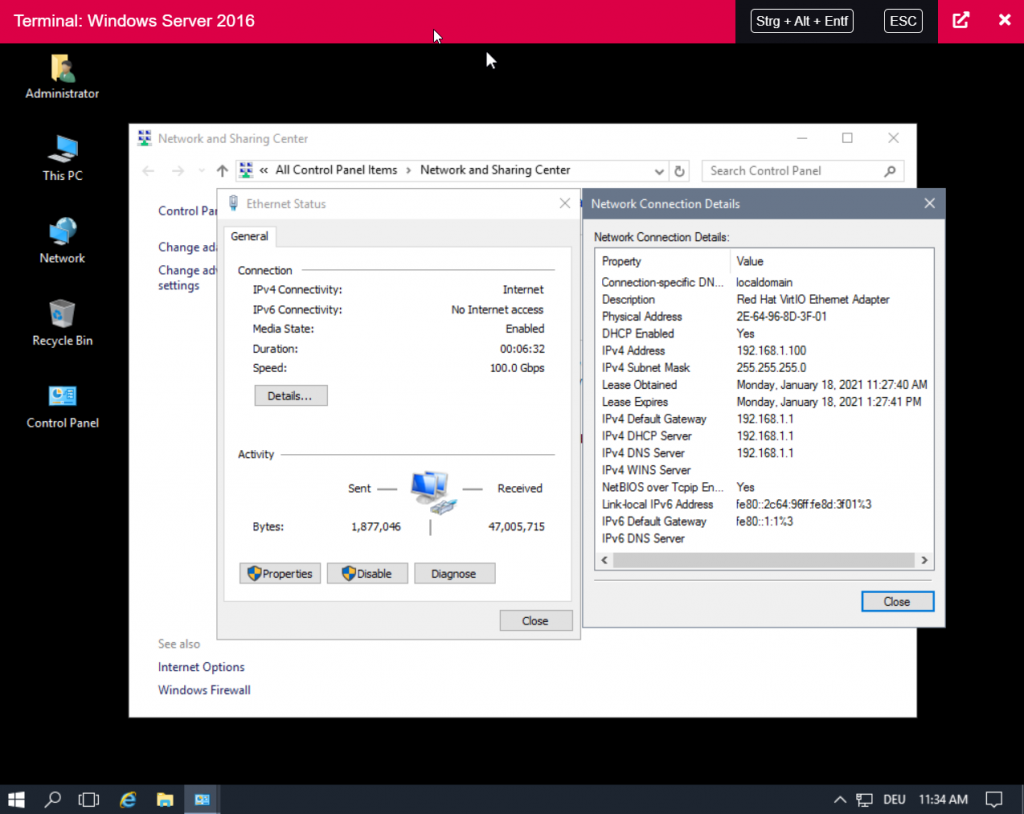
Next, we boot up the Windows client, open the console again and log in. As you will notice, the server is already connected to the internet. If you look at the network configuration, you will see that the client got the IP 192.168.1.100 from the DHCP server with the IP 192.168.1.1 of the pfSense.
Now open a browser and open the page 192.168.1.1 in a browser on the windows server. Log in here with the default user.
Username: admin
Password: pfsense
This is followed by an installation dialog. Here you can adjust the settings according to your wishes. If you are not sure, you can leave all settings at the default values. When you’re done with the dialog, the dashboard follows.
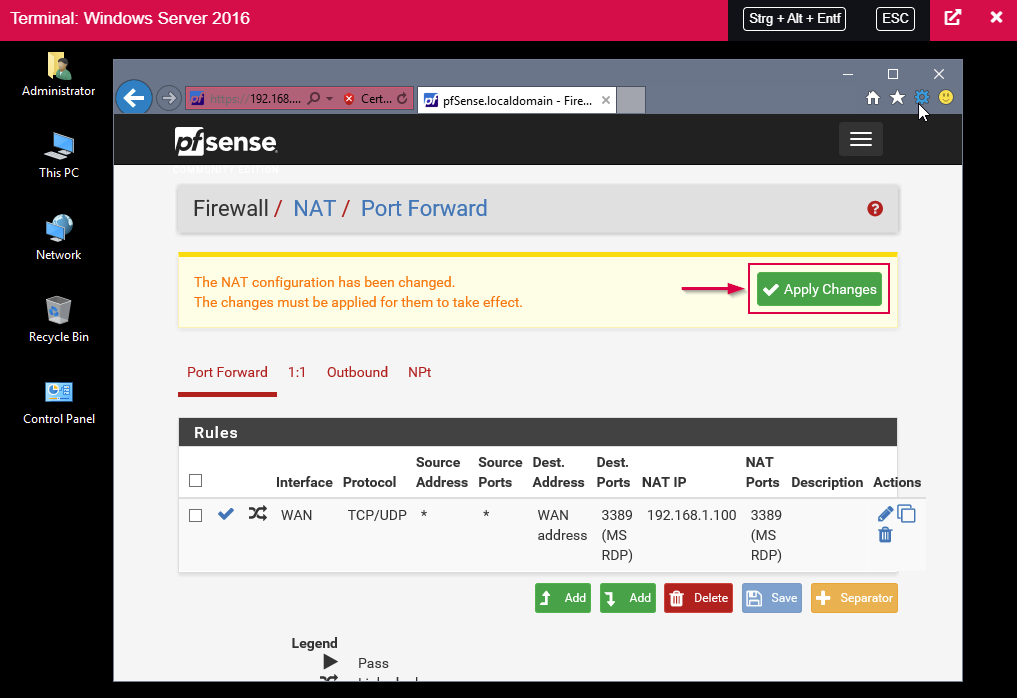
To pass RDP through to the Windows server, click on Firewall, then on NAT and on “Add”.

Here is a brief summary of the necessary settings:
Interface: WAN
Protocol: TCP/UDP
Destination port range From port: MS RDP
Destination port range To port: MS RDP
Redirect target IP: 192.168.1.100 (IP of the Windows server)
Redirect target Port: MS RDP
Then confirm everything by clicking on “Save”.
In the next step, the changes have to be “applied”.
RDP Verbindung testen
Establish an RDP connection to the public IP address of the pfSense. The access data are those of the Windows server.
Fazit
With these few steps you now have a gateway server with which you can secure your private network – a gateway server with which you can establish VPN connections, centralize the firewalls and also provide your network with a DNS and DHCP server.