
- Log in to the Plesk Control Panel.
- Go to Email on the left and then to Email settings at the top.
- Select the desired domain.
- Activate “Use DKIM spam protection system …” at the bottom and click on Apply.
>> From now on, emails from this domain will be sent with a DKIM signature. - You must enter two DNS records so that receiving servers can check the signature.
- You can find this via “Configuration of the external DNS” directly next to the activated box. (See screenshot).
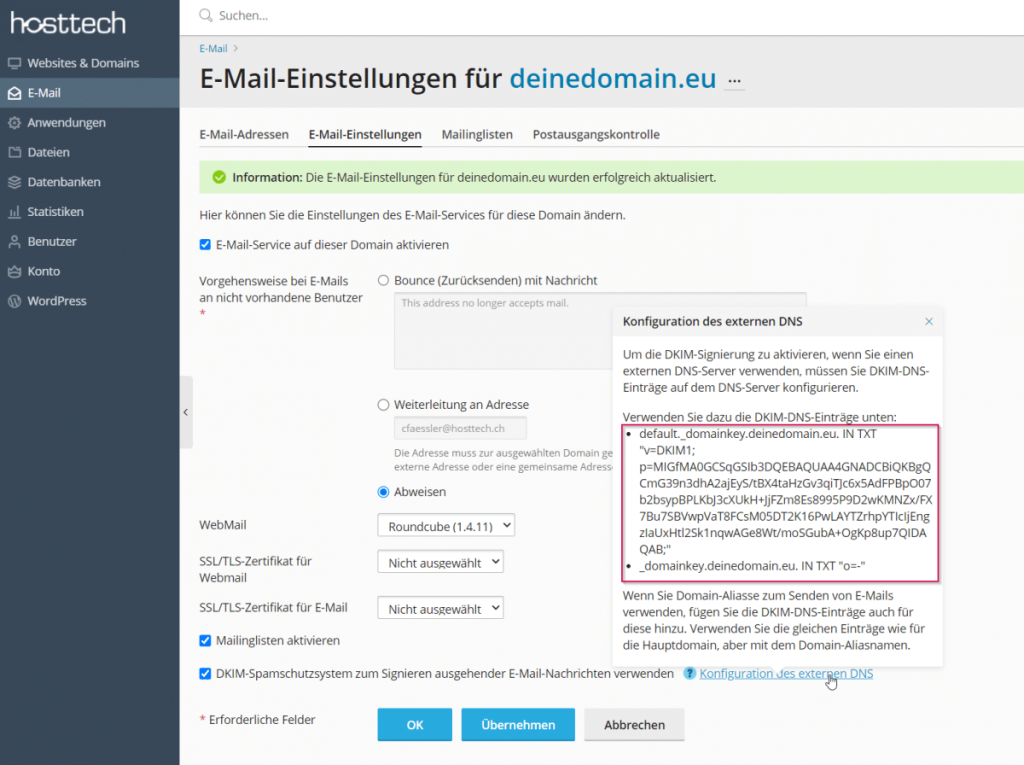
The whole thing looks more complicated than it is. Only the section between the quotation marks is important – it starts with v=DKIM1 and ends with QAB;.
If your DNS records are with hosttech, proceed as follows. Otherwise, log in to your domain registrar and create two new TXT records.
- Log in to the myhosttech.eu customer center.
- Select domains on the left > Domaincenter.
- Click on Details for the desired domain and then on DNS Records.
- Create the two TXT records as described.
TXT Record 1
Type: TXT
Host: default._domainkey.deinedomain.eu (Replace deinedomain.eu with the actual domain)
Content: according to Plesk (do not copy this text, it is valid per domain) from v=DKIM to and including QAB;
TTL: 3600
TXT Record 2
Type: TXT
Host: _domainkey.deinedomain.eu (Replace deinedomain.eu with the actual domain)
Content: o=-
TTL: 3600
With DKIM, the receiving server can check whether an email is genuine and therefore classify it as more trustworthy. However, there is no guarantee, as some servers do not check DKIM at all. However, the setting can never do any harm – at best it improves your chances.
If you have any questions, our technical support team will be happy to help. You can find out more about DKIM in our blog post.